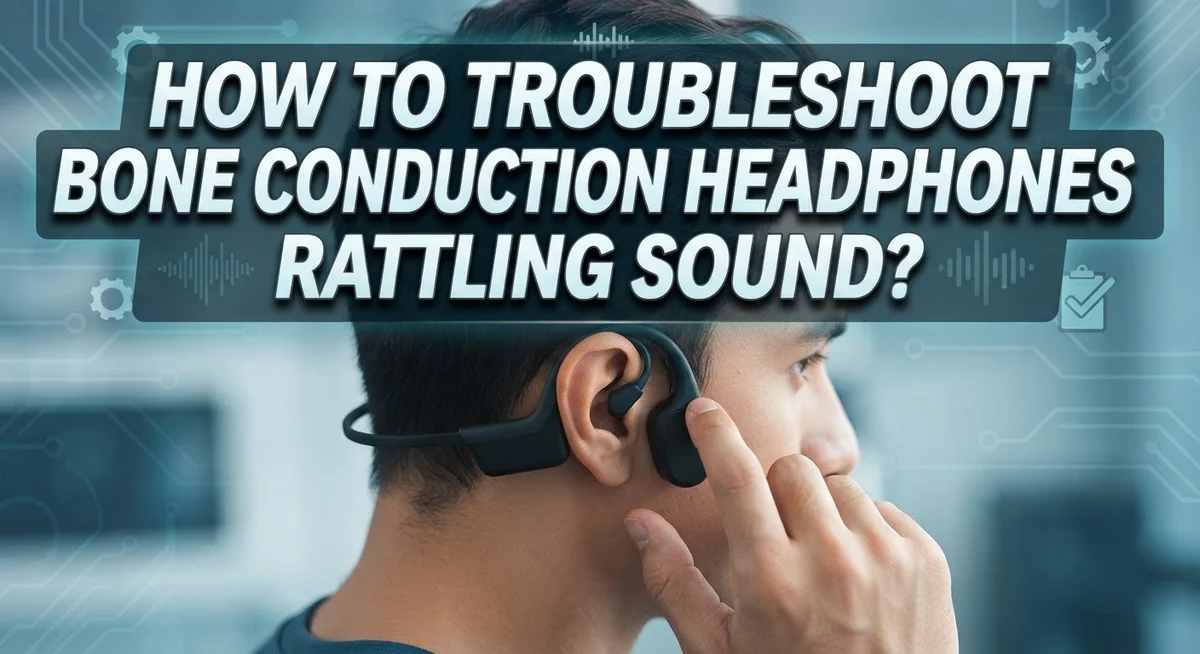
How To Troubleshoot Bone Conduction Headphones Rattling Sound?
That annoying rattling sound from your bone conduction headphones can ruin your entire listening experience. It’s frustrating, especially when you rely on them daily for workouts, commutes, or calls.
The good news? Most rattling issues are fixable. You don’t always need to replace your headphones or visit a repair shop.
Rattling sounds usually happen because of loose internal components, misaligned transducers, or even simple software problems. Some causes are easy to fix in minutes. Others need a bit more patience and care.
This guide walks you through every step of the troubleshooting process. You will learn how to identify the root cause of the rattling sound first. Then you will move through practical fixes, starting from the simplest solutions.
In a Nutshell
- Rattling sounds in bone conduction headphones are most often caused by loose internal components vibrating inside the casing.
- Misaligned transducers from improper headband positioning are another very common trigger for unwanted noise.
- Software problems like muted settings or outdated audio drivers can also create strange sounds, so always check these first before opening anything up.
- Hardware fixes may involve marking a glue port, carefully drilling a small hole, and applying adhesive to secure loose parts inside the unit.
- Proper headband alignment is a simple but powerful fix that many people overlook entirely.
- Always rule out software issues before attempting any physical repair to avoid unnecessary damage to your device.
What Causes a Rattling Sound in Bone Conduction Headphones?
Bone conduction headphones produce sound through vibration rather than traditional speakers. When you hear rattling, something inside the device is moving freely. Understanding what causes this noise helps you fix it faster.
Loose internal components are the most common culprit. The transducers, wiring, or small parts inside the casing can shift over time. When the device vibrates during use, these loose pieces rattle against the housing. This is especially common in headphones that have been dropped or used heavily.
Misaligned transducers create another major source of rattling. Your headband needs to sit perfectly on your head for the transducers to stay in the right position. When the headband shifts or bends unevenly, the transducers no longer sit flush. This causes them to vibrate incorrectly and produce rattling sounds.
Defective audio jacks or ports can also trigger rattling. A damaged jack connection may cause electrical signals to send incorrect vibration patterns to the transducers. The result sounds like an internal rattle even though the problem is at the connection point.
Software issues sometimes create sounds that feel like hardware rattling. Your headphones might be muted or set to an incorrect volume level. Outdated audio drivers on your device can also send faulty signals that produce strange noises. These software problems are easy to overlook because they seem like physical damage.
The key is identifying which cause applies to your situation. Start by checking if your headband sits properly. Then verify that your device settings are correct. Finally, inspect the physical condition of your headphones. This systematic approach narrows down the problem quickly and points you toward the right solution.
How to Identify Whether the Issue Is Software or Hardware
Start by testing whether your bone conduction headphones have a software or hardware problem. This distinction matters because it determines your next steps.
First, check the mute button. Many rattling sounds are actually just audio playing through muted headphones. Look for a mute indicator light or symbol on your device. Unmute the headphones and test again. The rattling often disappears immediately.
Next, examine your audio drivers. Outdated or corrupted drivers cause strange sounds that mimic rattling. Connect your headphones to a computer and check for driver updates. Visit your device manufacturer’s support page. Download and install any available updates. Restart your device and test the sound quality.
Test with different audio sources. Play music from your phone, computer, or tablet. If the rattling only happens with one device, the problem is likely software related. If it happens across all devices, you have a hardware issue.
Check your headband alignment. Remove the headphones and look at how the transducers sit against your head. They should be centered and level. Misalignment causes internal components to vibrate loosely. Reposition the headband and test again.
Listen carefully to the sound. Hardware rattling is a consistent vibration that matches the audio frequency. Software issues create crackling, popping, or intermittent sounds. This distinction helps you identify the root cause.
Document what you find. Note when the rattling happens, which devices trigger it, and what settings you changed. This information helps you explain the problem clearly if you need professional repair.
By systematically testing these areas, you will quickly determine whether software adjustments or hardware repair is necessary.
Checking and Fixing Headband Alignment and Transducer Positioning
Proper headband alignment keeps your transducers seated evenly against your skin. When the headband shifts or sits too loose, the transducers move around and create rattling vibrations.
Start by removing your headphones and inspecting the headband. Look at how the transducers position themselves. They should sit flat and centered on both sides of your head. If one transducer tilts inward or outward, that’s your alignment problem.
Check the headband tension next. Gently squeeze the headband to see if it feels loose or wobbly. A properly aligned headband should feel snug but not painfully tight. If the band feels flimsy, the transducers won’t stay in place during use.
Adjust the headband by loosening any adjustment straps or padding. Reposition the transducers so they align straight across your head. Tighten everything back up gradually. Test the fit by wearing the headphones and moving your head side to side.
Internal transducer positioning matters too. If your headband alignment looks correct but rattling persists, loose internal components might be the real issue. In this case, you may need to mark a glue port location above the speaker back. Use a small awl or drift punch to create a centering mark. This prevents your drill bit from wandering.
Drill a small hole carefully at the marked location. Apply adhesive through the port to secure any loose internal parts. Let the adhesive dry completely before wearing your headphones again.
Test your headphones after making adjustments. Move around and listen for rattling sounds. Proper alignment combined with secure internal components should eliminate most noise issues effectively.
How to Inspect and Repair Loose Internal Components
When internal components come loose inside your bone conduction headphones, you need a careful approach to fix them. The rattling sound you hear is often caused by small parts vibrating freely inside the casing.
Start by locating the glue port. This is a small opening above the speaker back where you can apply adhesive. Mark this location carefully before you proceed with any drilling. Use an awl or drift punch to create a center mark at your chosen spot. This step prevents your drill bit from wandering and causing damage to surrounding components.
Drill a small glue port at your marked location. Keep the hole tiny and precise. A larger hole can create new problems instead of solving your rattling issue. Work slowly and steadily to maintain control.
Once your port is ready, apply adhesive to secure the loose components. Use a small amount of the right adhesive type for your headphone materials. Let it dry completely before testing your headphones again.
Important safety note: Internal repairs carry risks. You might damage delicate components or create electrical hazards if moisture gets inside. If you feel uncomfortable drilling into your headphones, consider professional repair options instead.
Before attempting this repair, verify that your rattling is actually caused by loose internal parts. Test your headband alignment again and check that your audio drivers are current. Sometimes what feels like internal looseness is actually a software issue or misalignment problem that requires no drilling at all.
Take your time with each step. Rushing through internal repairs often makes problems worse rather than better.
Step-by-Step Guide to Drilling a Glue Port and Applying Adhesive
When you’re ready to fix loose internal components in your bone conduction headphones, precision matters. The process involves creating a small opening to inject adhesive that will stabilize the rattling parts inside.
Start by marking your glue port location. Look at the back of your headphone speaker area. You want to identify exactly where the loose component sits inside. Use a permanent marker to make a small dot on the casing. This mark should be above the speaker back, in a spot where drilling won’t damage critical electronics.
Use an awl or drift punch next. Center your punch tool directly on your marked spot. Tap it gently with a hammer to create a small indentation. This step prevents your drill bit from wandering across the surface. A centered mark keeps your hole precise and prevents accidental damage.
Drill your glue port carefully. Use a small drill bit appropriate for bone conduction headphone casing thickness. Start at low speed to maintain control. Apply gentle pressure without forcing the bit through. You’re creating a small opening, not a large hole. The port should be just large enough for adhesive to pass through.
Apply adhesive to secure loose parts. Use a thin applicator or syringe to inject adhesive through your new port. Work slowly and let gravity help the adhesive reach the loose components. Allow proper curing time before using your headphones again. Check your manufacturer’s guidance for recommended adhesive types and curing periods.
This repair requires patience. Rushing any step can cause additional damage inside your headphones.
Updating Audio Drivers and Checking Device Settings
Outdated audio drivers often cause rattling sounds in bone conduction headphones. Your operating system sends audio signals through drivers, and old drivers may not communicate properly with your headphones. This miscommunication creates vibrations that sound like rattling.
Start by checking your current driver version. On Windows, right click your speaker icon in the system tray. Select “Open Sound settings” from the menu. Scroll down and click “Advanced” or “App volume and device preferences.” Look for your bone conduction headphone model name in the list.
Next, visit the manufacturer’s support website. Find the drivers section for your specific headphone model. Download the latest audio driver version available. Most manufacturers provide step by step installation instructions on their pages.
Before installing new drivers, close all audio applications. This includes music apps, video players, and communication software. Unplug your headphones from your device temporarily. Install the new driver following the on screen prompts. Restart your computer when the installation finishes.
After restarting, reconnect your bone conduction headphones. Test the audio at normal volume levels. Pay attention to whether the rattling sound has stopped or reduced.
Also check your device’s audio settings while you’re troubleshooting. Verify that your headphones aren’t muted in system settings. Look for any audio enhancement features that might be enabled. Some devices have equalizer settings that can cause distortion if set too high.
If rattling continues after updating drivers and checking settings, the issue likely stems from hardware problems. Your internal components may be loose, requiring the repair methods mentioned in previous sections.
Common Mistakes to Avoid When Troubleshooting Rattling Sounds
Many people make mistakes during troubleshooting that make rattling worse. Understanding these errors helps you fix the problem correctly.
Skipping the headband alignment check is a major mistake. Your bone conduction headphones have transducers that must sit evenly on your head. If the headband isn’t positioned properly, the transducers move around and create rattling sounds. Always adjust your headband first before attempting any repairs.
Drilling without proper marking causes serious damage. Some people grab a drill and start making holes without centering their mark. Your drill bit will wander across the casing and create irregular holes. This ruins the headphone structure. Always use an awl or drift punch to create a center mark before drilling anything.
Ignoring software issues wastes your time on hardware fixes. Many people assume rattling comes from loose parts when the real culprit is muted audio settings or outdated drivers. Check if your headphones are muted first. Update your audio drivers next. These simple steps often solve the problem without opening your device.
Rushing internal repairs leads to broken components. Applying adhesive too quickly or using the wrong type can damage internal parts permanently. Take your time with each step and use the correct adhesive for your specific model.
Assuming all rattling sounds are internal is another common error. Sometimes rattling comes from external sources like loose battery covers or damaged charging ports. Inspect these areas thoroughly before attempting internal repairs.
Skipping the test phase means you won’t know if your fix worked. Always test your headphones after making adjustments to confirm the rattling has stopped.
When to Seek Professional Repair or Contact Support
If your troubleshooting efforts haven’t resolved the rattling sound, it’s time to consider professional help. You’ve already tried the basic fixes. Now you need to know when to move forward.
Contact manufacturer support first. Most bone conduction headphone makers offer warranty coverage for internal component failures. You’ll need your purchase receipt and model number. Support teams can often diagnose the issue over the phone or through email. They may authorize a replacement or repair at no cost if your headphones are still under warranty.
Reach out through the official website or customer service number. Provide clear details about when the rattling started and what troubleshooting you’ve already completed. This information helps support staff understand your situation faster.
Professional repair services are your next option. If warranty coverage has expired, independent repair shops can open your headphones safely. They have proper tools and adhesives designed for bone conduction headphone casings. These technicians can access internal components without causing additional damage.
Look for repair services in your area that specifically handle audio equipment. Call ahead and describe your rattling issue. Ask about their experience with bone conduction headphones specifically.
Know when DIY repair becomes risky. If you’re uncomfortable drilling or applying adhesive, stop and seek professional help. Mistakes during internal repairs can permanently damage your headphones. The cost of professional service is often less than replacing the entire device.
Don’t delay getting help if rattling worsens. Loose internal components can cause additional damage over time. Professional repair or manufacturer support ensures your headphones work properly again without risk of further harm.
Final Thoughts
Rattling sounds in bone conduction headphones are frustrating, but they are almost always fixable with the right approach.
The key is to work through the problem in the correct order. Always start with software checks before touching any hardware. Many rattling issues disappear after a simple driver update or settings adjustment.
If software fixes don’t work, move to physical checks. Verify that your headband is properly aligned and that the transducers sit evenly against your temples. This small step prevents many internal vibration problems.
When hardware inspection is needed, be precise and patient. Marking your drill point carefully before drilling protects your device from further damage. Rushing this step causes more harm than the original problem.
Applying adhesive correctly is just as important as drilling correctly. Use the right amount and allow full curing time before testing. A partial fix often leads to repeat rattling.
Always test your headphones after each troubleshooting step. This tells you exactly which fix solved the problem and prevents unnecessary additional repairs.
Know your limits during DIY repair. If you feel uncertain at any point, stopping and seeking professional help is the smarter choice. Warranty options and professional repair services exist for exactly these situations.
The troubleshooting process covered in this guide moves logically from simple to complex. Following each step in sequence saves time and protects your device.
Bone conduction headphones are built with precision internal components, and small vibrations can escalate into bigger failures if ignored. Addressing rattling sounds early keeps your headphones performing well for much longer.
Stay patient, stay systematic, and your headphones will likely sound great again soon.
Frequently Asked Questions
Why does my bone conduction headphone rattle when I move it?
Rattling happens when internal components become loose inside the headphone casing. These parts vibrate freely when you move the device. The most common culprit is a loose transducer or internal wiring that has shifted from its original position.
Headband misalignment also causes this problem. When the headband sits incorrectly, the transducers don’t sit evenly against your skin. This creates extra vibration and that annoying rattle sound.
Can software issues cause rattling sounds?
Yes, software problems can create sounds that feel like rattling. A muted headphone setting might produce crackling or buzzing that sounds like internal rattling. Outdated audio drivers can also cause audio distortion.
Always check your device settings first. Look for mute toggles or volume settings that might be causing the noise. Update your audio drivers if you’re using bone conduction headphones with a computer.
What’s the safest way to fix internal rattling myself?
Start by checking your headband alignment. Make sure it sits evenly and the transducers contact your skin properly. This fixes many rattling issues without any drilling.
If rattling persists, marking the location carefully before drilling prevents serious damage. Use a center mark with an awl before drilling any glue port. Apply adhesive to secure loose internal components once you’ve located them.
When should I stop troubleshooting and seek help?
Stop if you feel uncomfortable drilling or handling adhesive inside your headphones. Professional repair services handle internal component failures safely. Contact the manufacturer first to check warranty coverage on your device.

Hi, I’m Amy! I’m passionate about tech and love breaking down complex product specs into simple, actionable advice. I review gadgets, compare tools, and write buying guides to help you spend smarter. Got a question? Drop me a message — I’d love to hear from you!